How To Change A Light Fixture
Share
For people who don’t know exactly how lights are configured, changing a light fixture can be a real challenge. Fortunately, the majority of light fixtures work in similar ways. This means that, once you learn the basics, you can replace many of the fixtures in your home or office with ease! That said, if you encounter a fixture that stumps you, there’s no shame in calling the electrician.
So, what tools do you need to replace a light fixture? What are the best safety practices to follow? How can you turn off the power before changing a light fixture? Finally, where can find high-quality light fixtures at affordable prices?
In today’s guide, we will answer all of these questions and help you learn how to change a light fixture in no time!
General Safety Measures
Since changing a light fixture involves electrical wires, there are certain precautions you should take to avoid an accident. Here are some of the most important safety rules to follow:
- Turn Off the Power - Before you do anything else, make sure that the power supply to the light is turned off. Turning the light switch off is not enough. Instead, you’ll need to power off the correct circuit on the breaker box. If you’re unsure which circuit corresponds with the light fixture you’re replacing, try turning off different circuits until you find the one that cuts off electricity to the right area.
- Use Safe Tools - When doing any kind of electrical work, you’ll want to use insulated tools with rubber handles. This way, if the metal end of the tool comes into contact with an electrical current, you are less likely to get shocked. You should also consider wearing safety gloves for even greater protection.
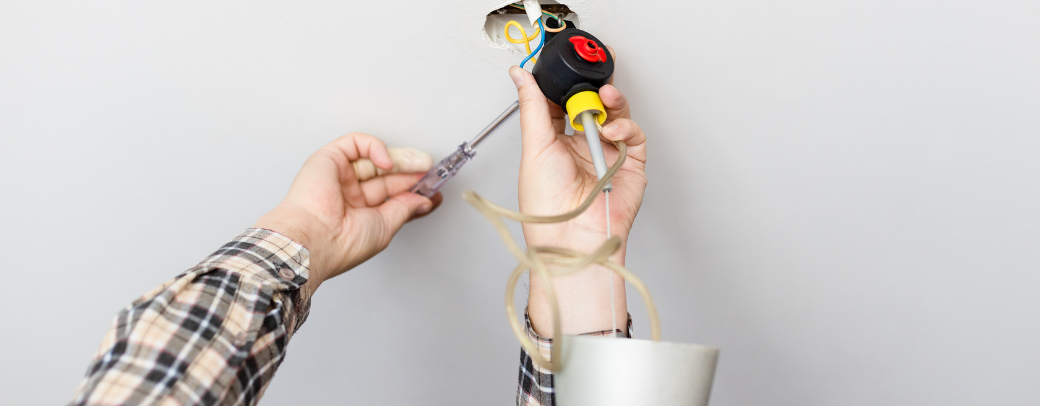
- Have a Voltage Tester On Hand - A voltage tester allows you to see if wires are still “live” after you’ve turned the circuit off. Even with the circuit off, there’s still a chance that you could get shocked by touching the wires. With a voltage tester, you can determine if wires are safe to touch ahead of time.
- Use a Stable Ladder - Many light fixtures are attached to the ceiling and require a step ladder or standard ladder to reach. Either way, make sure that you’re ladder is in good condition and is at the right height to comfortably reach the fixture without stretching. Never try to stand on a chair or piece of furniture to reach a light fixture, as you could easily fall. Be especially careful when replacing bathroom light fixtures, as there are many hard, slick surfaces below.
- Check the Wattage - Once you’re ready to screw a bulb into the new fixture, you should make sure that the bulb is of the correct wattage. A bulb with a wattage that is too high for the fixture could be a potential fire hazard.
- Defer to Manufacturer Instructions - When in doubt, always defer to the instructions from the manufacturer. Some light fixtures have unique designs and may require special steps not included in this guide. Therefore, it’s always a good idea to reference the manufacturer’s website or the manual for the light fixture before you proceed.
- Ground Your New Fixture - During the installation process, you’ll need to wire your new fixture. If the fixture is 100% plastic, you don’t need to worry about grounding it. But if your fixture contains metal, you’ll want to make sure that the grounding wire (typically green or bare copper) is attached to the electrical box. This allows electricity to be rerouted to the ground, greatly reducing the risk of electrocution.
How To Remove The Old Fixture
Removing an old fixture is typically the easiest part of the process, but you’ll still need to follow the necessary safety precautions and be careful to avoid causing damage to the wiring or fixture. Here are the steps you should follow for most standard light fixtures:
- Turn off the power from the circuit breaker
- Remove the shade or cover from the light fixture
- Make sure that the light bulbs have had time to cool since the light was last turned on, then carefully remove the bulbs
- With a rubber-handled screwdriver, begin loosening the screws holding the fixture to the wall or ceiling; you may want to use one hand to hold the fixture in place so that it does not fall
- Slowly lower the fixture from the wall or ceiling; do not pull it away, as it will still have wires connected to the base
- Take note of how the wires are connected to the electrical box, then untwist the wires and disconnect them
- If there’s a mounting bracket, remove it from the electrical box and set the old fixture aside
How To Wire The New Fixture
Now that you have your old fixture out of the way, it’s time to begin wiring the new fixture:
- Ensure that the power is still turned off at the circuit breaker
- Check the owner’s manual or manufacturer’s website to see if there are any special instructions you need to follow
- Attach the new mounting bracket (if applicable) to the electrical box with screws
- If your fixture is metal, you’ll want to make sure it’s grounded before you proceed; to ground a light fixture, attach the fixture’s grounding wire (typically green or copper) to the electrical box
- Match the remaining wires on the new fixture to the correct wires on the electrical box; you will usually need to connect the wires that have the same colors
- Twist the ends of the wires together and secure them with a wire nut; you may want to wrap the wires with electrical tape for additional security
*Note: While every fixture is different, electrical wires often use the same colors to denote their purpose. For example, black or red wires are typically the “hot” wires that carry electricity from the electrical box to the light fixture. White wires are usually “neutral,” meaning that they return unused electricity to the electrical box. Lastly, a green or bare copper wire connects the fixture to the grounding system.
How To Install The New Light Fixture
Finally, once the wires are connected correctly, you can finish installing your new light fixture:
- Attach the new mounting bracket to the electrical box with screws
- Attach the new fixture to the mounting bracket
- Screw in the bulb (or bulbs) and attach the shade or cover (if applicable)
- Turn the power back on and test the new fixture to make sure that everything is working correctly
As you can see, removing an old fixture and installing a new one is not overly complicated. The most important part is making sure that you’re power is turned off and that you’re implementing all of the necessary safety measures. If you’re worried about making a mistake or simply prefer to let a professional handle the job for you, you can always reach out to an electrician for assistance.
We hope you found this guide on how to change a light fixture both fun and informative! Are you interested in learning more about the best light fixtures on the market? Are you ready to purchase high-quality light bulbs and light fixtures at affordable prices? If so, be sure to check out the products available at Bulb Center today!